Requirements:
- A Twitch account (sign up here!)
- Open Broadcast Software installed (download here!)
Starting OBS:
Adding Sources to a Scene:
When you first start OBS, it will have a single Scene created for you. Within the terminology of OBS, a Scene is a collection of arranged sources. It’s similar to the metaphor of a stage, in a way. You arrange all the different sources you want, be those windows capturing, video from different things, or extra audio inputs, and then record or stream when ready.
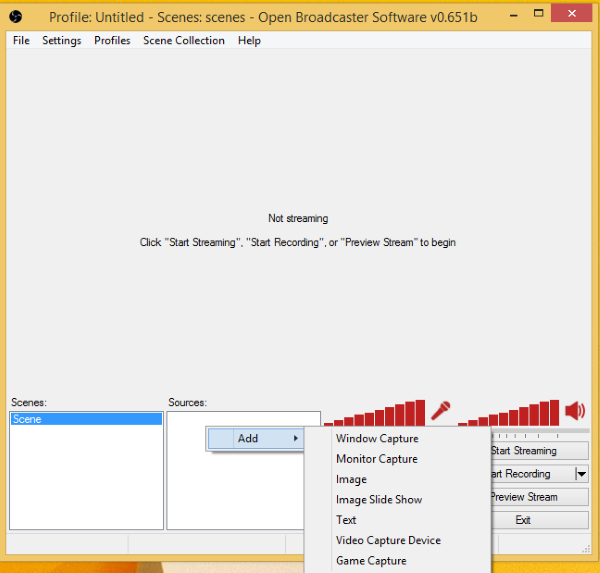
To add sources to a scene, right-click and highlight “Add” to select what source you want.
Windows:
Mac:
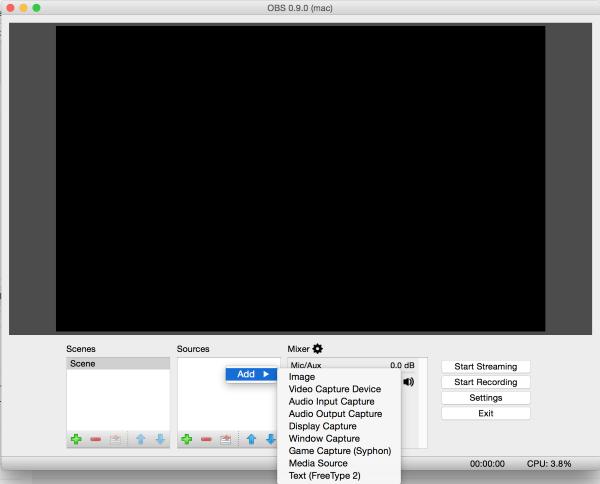
(Note: On Mac, you can also add or remove sources through the plus and minus buttons under the “Sources” heading.)
Previewing Sources
Once you have added all of your sources for the Scene, you should arrange and preview how they would look on the stream.
Windows:

In the Windows version, you need to first click on the “Preview Stream” button before you can see or even arrange elements in the Scene.
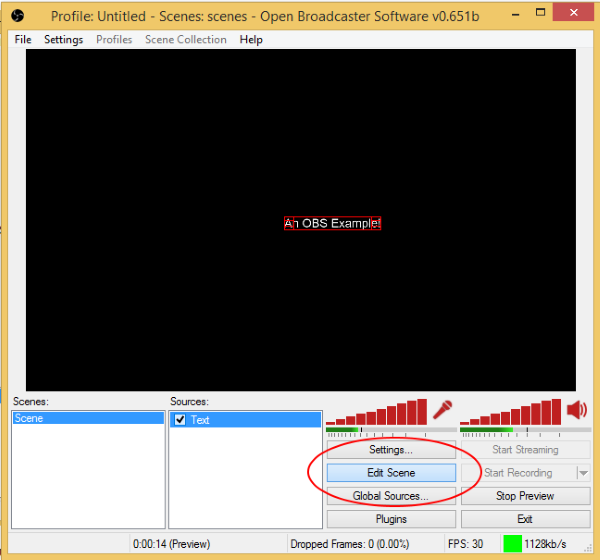
Once in Preview, you can click on the “Edit Scene” button to move sources around on the screen. Each source within the Editing mode of Preview will have a red box around it and can be re-sized or dragged into the position wanted.
Once done arranging all of your sources, click on “Stop Preview” to end the Preview.
Mac:
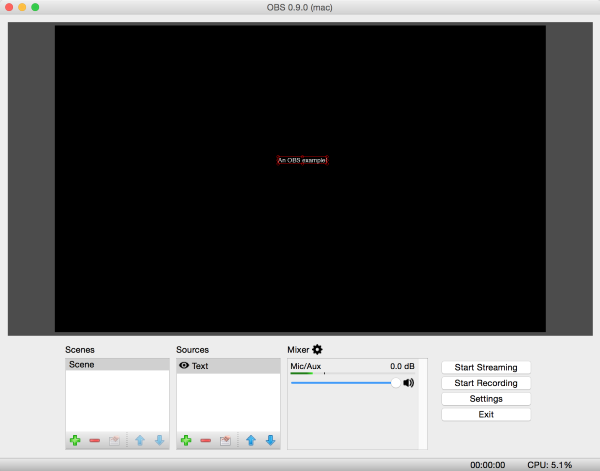
In the Mac version, each source you add will automatically be in preview mode. Each source will, upon being added to the scene, have a red box around it and can be re-sized or arranged as needed.
(Note: OBS can only “see” windows, video, or audio inputs that are opened or running before it is. This means you will need to start any programs, games, or open windows before trying to record them, often needing to bring up and configure OBS as the last step in preparing sources for streaming, recording, or both.)
Finding your Stream Key on Twitch:
To stream to Twitch, you will need to enter your stream key in OBS. 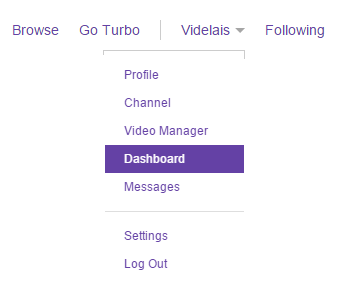
To find it, first login to Twitch from its homepage. Then, click on your account name and then click on “Dashboard”
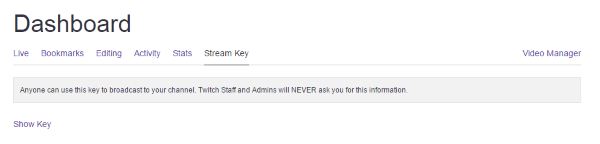
From your Dashboard, click on the “Stream Key” tab.
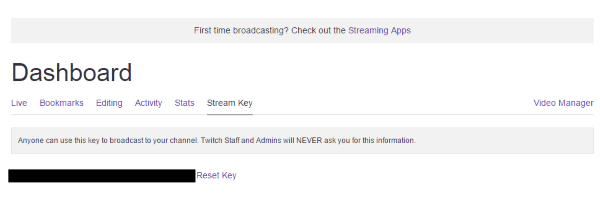
On the “Stream Key” tab, click on the “Show Key” link. This will display your stream key.
Copy the key.
Configuring Streaming on OBS:
With the sources configured and stream key found, it is time to configure OBS for streaming using Twitch.
Windows:
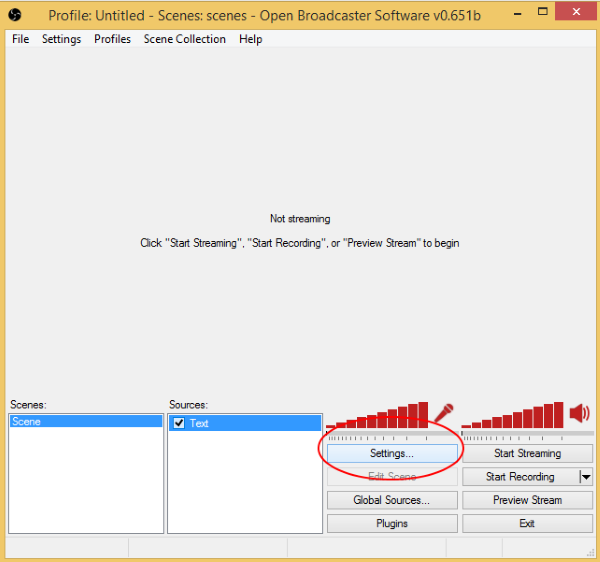
Click on “Settings” from the main window. (Alternatively, clicking on Settings -> Settings from the file menu.)

From within the “Settings” window, click on the “Broadcast Settings” in the left panel.
In Broadcast Settings, select “Twitch” from the Streaming Service drop-down menu.
For the “Play Path/Stream Key (if any)”, paste your Twitch Stream Key.
For the FMS URL, select the nearest location to where you are.
Once done, click on “Apply” in the bottom, right-hand corner and then “OK” finish.
Mac:
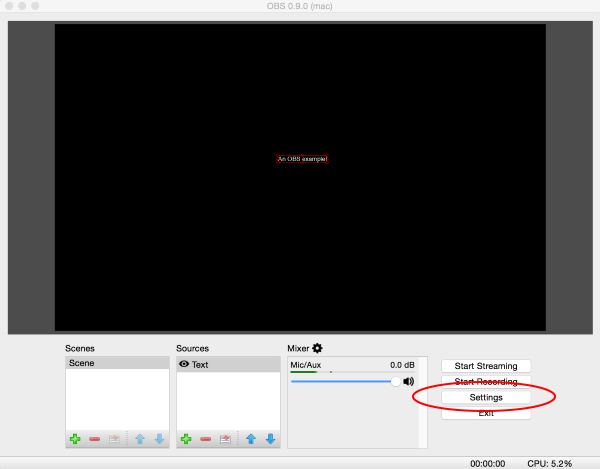
Click on the “Settings” button.

In the Settings window, click on “Stream” from the left panel.
For Service, select “Twitch” from the drop-down menu.
For Server, select the nearest location to where you are.
For the Stream key, paste your Twitch Stream Key.
Once done, click on “Apply” in the lower left-hand corner and then click on “OK” in the lower right-hand corner.
Streaming:
In either the Windows or Mac versions, click on “Start Streaming” to stream your configured sources on Twitch. While streaming, you can also click on “Start Recording” to produce a local copy of the same sources.
In both cases, simply click on “Stop Streaming” or “Stop Recording” once either is started to stop each.
