Working with Unity Test Framework
- Part 1: Preparing Test Runner
- Part 2: Writing Play Mode Tests
- Part 3: Using Edit Mode Testing
The Unity Test Framework (UTF) provides a way for developers to write unit and integration tests via built-in usage of the NUnit library in Unity. Tests can be run in either Play or Edit Mode, depending on the need and context of the testing.
Part 2: Writing Play Mode Tests
What Can and Cannot Be Easily Tested in Unity
As covered in Part 1, it is possible to create a new test assembly and script file using the Test Runner Window accessed through Window –> General –> Test Runner. Using the “Create PlayMode Test Assembly Folder” button and then “Create Test Script in Current Folder” button, tests can configured, created, and then run all from the Test Runner Window. What was not mentioned was what can and cannot be easily tested using the Unity Test Framework itself.
One of the hardest things to test in Unity is player input. As the following extended example shows, any use of the Input class must be broken up into its own methods for easier testing on the result of the action rather than the combined input usage.
2D Script Example: Pressing Buttons to Move
A common pattern in a 2D game is pressing a a key on a keyboard and having something like a Sprite move as a result. A simple, but silly, example, might be something like the following:
using System.Collections;
using System.Collections.Generic;
using UnityEngine;

public class PlayerController : MonoBehaviour
{
    // Start is called before the first frame update
    void Start()
    {

    }

    // Update is called once per frame
    void Update()
    {
        if(Input.GetKeyDown(KeyCode.A))
        {
            // Change the current position by -1 on the x-axis.
            transform.position = transform.position + new Vector3(-1, 0, 0);
        }

        if(Input.GetKeyDown(KeyCode.D))
        {
            // Change the current position by +1 on the x-axis.
            transform.position = transform.position + new Vector3(1, 0, 0);
        }
    }
}
In the above code, the method Input.GetKeyDown() is used twice. The first checks if the KeyCode.A is used and the second checks for KeyCode.D. If the first happens, the GameObject attached to this Script Component would have its transform.position changed by a negative 1 on the x-axis. The second produces a positive change.
While the pattern like the above is common in projects, it is very difficult to test using UTF. The reason for the difficulty is connected to how Unity handles input events. When a scene runs, Unity uses the Input class to provide a developer with access to if any events are happening when the scene runs as updated by the Input System. All methods are “get” methods; they check if something is occurring, not generate the event.
It is not possible to simulate or create Input events easily in Unity. The existing classes and methods in Unity are not designed to create input events or simulate key presses. Testing the above code, with its use of multiple Input methods, would be quite difficult. However, this does not mean the same effect cannot be achieved through thinking about units within the code itself.
Movement Methods
Within the Update() method in the above code, two different actions are occurring: movement in a positive direction and movement in a negative direction. Instead of combining them, one approach to understanding their actions could be to break them up into their own methods, making each their own “unit” within the class.
Updated Script Example
using System.Collections;
using System.Collections.Generic;
using UnityEngine;

public class PlayerController : MonoBehaviour
{
    // Start is called before the first frame update
    void Start()
    {

    }

    void MoveLeft()
    {
        // Change the current position by -1 on the x-axis.
        transform.position = transform.position + new Vector3(-1, 0, 0);
    }

    void MoveRight()
    {
        // Change the current position by +1 on the x-axis.
        transform.position = transform.position + new Vector3(1, 0, 0);
    }

    // Update is called once per frame
    void Update()
    {
        if(Input.GetKeyDown(KeyCode.A))
        {
            MoveLeft();
        }

        if(Input.GetKeyDown(KeyCode.D))
        {
            MoveRight();
        }
    }
}
In the updated version, the result of pressing either the “A” or “D” keys are the same. However, the code is now structured differently. The method MoveLeft() now handles the left movement and the MoveRight() the right movement. This also separates them from the Input class logic, meaning the implementation of either method could change, such as using the Physics System for smooth movement over time, for example, and the “key pressing” would still produce the same internal result.
Testing with Prefabs
When a GameObject is usually created, it is made as part of adding it to the Hierarchy View. This adds the GameObject to the currently open scene. However, tests do not run in the current scene. They run a separate scene created by the Test Runner code.
Created GameObjects cannot be tested without being a Prefab. The only way to test a GameObject is through creating a Prefab based on the GameObject. (Prefabs can be most easily created through dragging and dropping a GameObject from the Hierarchy View to the Project View.)
Working with the Resources Class
Unity provides the Resources class for working with or dynamically loading assets. This class, however, requires a very specific rule: to load any assets, they must be in a folder named Resources.
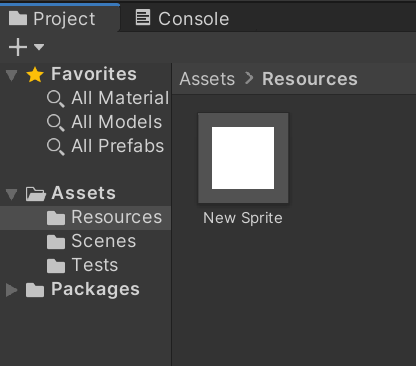
To most easily test the methods of the Script Component of any created GameObject, it must first be a Prefab and be placed in the Resources folder. This will make it accessible via the Resources class for dynamic loading during testing.
Testing the PlayerController Class
After creating a Prefab and then moving it into the Resources folder, it is ready to be dynamically loaded and tested.
Writing a Test Using the [Test] Attribute
// All tests should have the [Test] attribute.
//
// Tests should also use PascalCase, every word starting with a capital letter.
[Test]
public void TestForPlayerLeftMovement()
{
}
Within a script created by the Test Runner Window, new tests are created using the [Test] attribute for each method within the created class. These are the tests run by the Test Runner Window.
Loading a Resource Prefab
using NUnit.Framework;
using UnityEngine;

namespace Tests
{
    public class NewTestScript
    {
        // All tests should have the [Test] attribute.
        //
        // Tests should also use PascalCase, every word starting with a capital letter.
        [Test]
        public void TestForPlayerLeftMovement()
        {
            // Instantiate a Player GameObject.
            // (This MUST be a prefab it creates in the test scene.)
            GameObject playerGameObject = MonoBehaviour.Instantiate(Resources.Load<GameObject>("New Sprite"));


        }
    }
}
Based on the name, not including the filename, the method Resources.Load() creates an object. With the existing Prefab named “New Sprite” (based on the default name for a Sprite GameObject), it can be loaded dynamically within the test method.
The method Instantiate() is part of the class MonoBehavior. This is normally part of what is inherited by any behavior scripts created by a Script Component. Because tests do not inherit from MonoBehavior, the method Instantiate() must be called more directly.
In the above code, the Prefab GameObject is created (instantiated) by the resource loaded from inside the Assets folder.
Sending Messages to Class Methods
The methods of a Scripting Component class cannot be called directly. Instead, the method SendMessage() must be used as part of a GameObject.
using NUnit.Framework;
using UnityEngine;

namespace Tests
{
    public class NewTestScript
    {
        // All tests should have the [Test] attribute.
        //
        // Tests should also use PascalCase, every word starting with a capital letter.
        [Test]
        public void TestForPlayerLeftMovement()
        {
            // Instantiate a Player GameObject.
            // (This MUST be a prefab to create it in the test scene.)
            GameObject playerGameObject = MonoBehaviour.Instantiate(Resources.Load<GameObject>("New Sprite"));

            // Save the initial x position.
            float x = playerGameObject.transform.position.x;

            // Call (send message to) the method MoveLeft().
            playerGameObject.SendMessage("MoveLeft");

            // Save the updated x position.
            float updatedX = playerGameObject.transform.position.x;


        }
    }
}
Asserting a Change
Within a test, the class Assert provides methods like AreEqual(). These “assert” if values can be compared such as if they are equal, no-equal, or exist within some other relationship.
Each test should have at least one use of a method from the Assert class.
using NUnit.Framework;
using UnityEngine;

namespace Tests
{
    public class NewTestScript
    {
        // All tests should have the [Test] attribute.
        //
        // Tests should also use PascalCase, every word starting with a capital letter.
        [Test]
        public void TestForPlayerLeftMovement()
        {
            // Instantiate a Player GameObject.
            // (This MUST be a prefab to create it in the test scene.)
            GameObject playerGameObject = MonoBehaviour.Instantiate(Resources.Load<GameObject>("New Sprite"));

            // Save the initial x position.
            float x = playerGameObject.transform.position.x;

            // Call (send message to) the method MoveLeft().
            playerGameObject.SendMessage("MoveLeft");

            // Save the updated x position.
            float updatedX = playerGameObject.transform.position.x;

            // Each test should have at least one use of the Assert class.
            //
            // In this example, it tests if the position
            //  changed as a result of the MoveLeft() usage.
            Assert.AreNotEqual(x, updatedX);
        }
    }
}
Completing the Tests
Unit test collections should test every “unit.” In the previous example, only the method MoveLeft() was tested. A complete collection of unit tests should test every method within the class.
using NUnit.Framework;
using UnityEngine;

namespace Tests
{
    public class NewTestScript
    {
        // All tests should have the [Test] attribute.
        //
        // Tests should also use PascalCase, every word starting with a capital letter.
        [Test]
        public void TestForPlayerLeftMovement()
        {
            // Instantiate a Player GameObject.
            // (This MUST be a prefab to create it in the test scene.)
            GameObject playerGameObject = MonoBehaviour.Instantiate(Resources.Load<GameObject>("New Sprite"));

            // Save the initial x position.
            float x = playerGameObject.transform.position.x;

            // Call (send message to) the method MoveLeft().
            playerGameObject.SendMessage("MoveLeft");

            // Save the updated x position.
            float updatedX = playerGameObject.transform.position.x;

            // Each test should have at least one use of the Assert class.
            //
            // In this example, it tests if the position
            //  changed as a result of the MoveLeft() usage.
            Assert.AreNotEqual(x, updatedX);
        }

        // All tests should have the [Test] attribute.
        //
        // Tests should also use PascalCase, every word starting with a capital letter.
        [Test]
        public void TestForPlayerRightMovement()
        {
            // Instantiate a Player GameObject.
            // (This MUST be a prefab to create it in the test scene.)
            GameObject playerGameObject = MonoBehaviour.Instantiate(Resources.Load<GameObject>("New Sprite"));

            // Save the initial x position.
            float x = playerGameObject.transform.position.x;

            // Call (send message to) the method MoveRight().
            playerGameObject.SendMessage("MoveRight");

            // Save the updated x position.
            float updatedX = playerGameObject.transform.position.x;

            // Each test should have at least one use of the Assert class.
            //
            // In this example, it tests if the position
            //  changed as a result of the MoveRight() usage.
            Assert.AreNotEqual(x, updatedX);
        }
    }
}
Optimizing Tests: PlayerController Example
In the previous two tests, the code was very similar. Both dynamically loaded the created Prefab based on the GameObject object and used the same general variables. In cases like this, the NUnit library provides additional attributes, [SetUp] and [TearDown], for setting things up for test and then tearing them down.
Setting Up
When a method uses the attribute [SetUp], it is called before each other method with the attribute [Test].
using NUnit.Framework;
using UnityEngine;

namespace Tests
{
    public class NewTestScript
    {
        // GameObject used across test methods.
        GameObject playerGameObject;

        // x used across test methods.
        float x;

        // updatedX used across test methods.
        float updatedX;

        [SetUp]
        public void Setup()
        {
            // Instantiate a Player GameObject.
            // (This MUST be a prefab to create it in the test scene.)
            playerGameObject = MonoBehaviour.Instantiate(Resources.Load<GameObject>("New Sprite"));

            // Save the initial x position.
            x = playerGameObject.transform.position.x;
        }

        [Test]
        public void TestForPlayerLeftMovement()
        {
            // Call (send message to) the method MoveLeft().
            playerGameObject.SendMessage("MoveLeft");

            // Save the updated x position.
            updatedX = playerGameObject.transform.position.x;

            // Each test should have at least one use of the Assert class.
            //
            // In this example, it tests if the position
            //  changed as a result of the MoveLeft() usage.
            Assert.AreNotEqual(x, updatedX);
        }

        [Test]
        public void TestForPlayerRightMovement()
        {
            // Call (send message to) the method MoveRight().
            playerGameObject.SendMessage("MoveRight");

            // Save the updated x position.
            updatedX = playerGameObject.transform.position.x;

            // Each test should have at least one use of the Assert class.
            //
            // In this example, it tests if the position
            //  changed as a result of the MoveLeft() usage.
            Assert.AreNotEqual(x, updatedX);
        }
    }
}
In the updated code, the method Setup() is called before both TestForPlayerLeftMovement() and TestForPlayerRightMovement() through the use of the [SetUp] attribute. This allows testing scripts to “set up” things before any others run.
Tearing Down
The attribute [TearDown] runs after each test. This allows values to reset or otherwise destroy things between tests.
using NUnit.Framework;
using UnityEngine;

namespace Tests
{
    public class NewTestScript
    {
        // GameObject used across test methods.
        GameObject playerGameObject;

        // x used across test methods.
        float x;

        // updatedX used across test methods.
        float updatedX;

        [SetUp]
        public void Setup()
        {
            // Instantiate a Player GameObject.
            // (This MUST be a prefab to create it in the test scene.)
            playerGameObject = MonoBehaviour.Instantiate(Resources.Load<GameObject>("New Sprite"));

            // Save the initial x position.
            x = playerGameObject.transform.position.x;
        }

        [Test]
        public void TestForPlayerLeftMovement()
        {
            // Call (send message to) the method MoveLeft().
            playerGameObject.SendMessage("MoveLeft");

            // Save the updated x position.
            updatedX = playerGameObject.transform.position.x;

            // Each test should have at least one use of the Assert class.
            //
            // In this example, it tests if the position
            //  changed as a result of the MoveLeft() usage.
            Assert.AreNotEqual(x, updatedX);
        }

        [Test]
        public void TestForPlayerRightMovement()
        {
            // Call (send message to) the method MoveRight().
            playerGameObject.SendMessage("MoveRight");

            // Save the updated x position.
            updatedX = playerGameObject.transform.position.x;

            // Each test should have at least one use of the Assert class.
            //
            // In this example, it tests if the position
            //  changed as a result of the MoveLeft() usage.
            Assert.AreNotEqual(x, updatedX);
        }

        [TearDown]
        public void TearDown()
        {
            // Destory the created object.
            Object.Destroy(playerGameObject);

            // Reset x.
            x = 0.0f;

            // Reset updatedX.
            updatedX = 0.0f;
        }
    }
}
