I’ve made around a dozen games using Flash Develop and Flixel over the last two years. Some were short prototypes and others were thousands of lines across many files. All of them started though from the simple framework of a few files created in Flash Develop and using the Flixel game library.
Before getting too far into showing you how to setup and then walking you through an example game using these two tools, one really important consideration needs to be addressed.
Requirements:
- Windows (XP or newer)
- .Net 4 runtime installed
- Java runtime installed
- A reliable Internet connection
You need to be running at least Windows XP with the .Net and Java runtimes installed. There is no way around this. You must have them. Chances are good, if you are running a newer machine with Windows, you already have them. If not, take time to get them now.
The installer for Flash Develop will also be downloading software development kits (SDKs) too. Make sure you have a stable connection for the length of the installation process. Depending on your connection speed, the total installation time could potentially be lengthy. Before starting, make sure to take that into account.
First, visit flashdevelop.org and look for the big green download image.
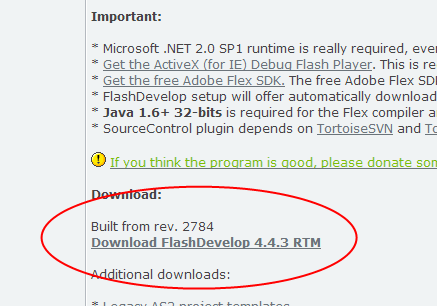
 Clicking on it will send you to the Flash Develop forum page for the current version. You will need to scroll down the page some until you see the section labeled “Download” with the link to the current build.
After downloading, run the installer. It will remind you again that you will need Java installed in order to run Flash Develop.

Clicking “Next” will progress to which components to install along with development environment. Clicking on the drop-down menu and selecting Custom (if it isn’t already selected) will show what will be installed.
Make sure, if they are not selected, each SDK is going to be installed. Optionally, if wanted, the Google Closure Compiler for JavaScript can be installed as well. (It’s the Install JS Compiler option.)

The installer will now begin to extract and eventually download the files it needs.

Depending on your connection speed and other variables, this whole process could take a long time. So, while that is going on, we will go find and download the Flixel game library.
Like Flash Develop, Flixel too has a very straightforward URL: flixel.org
And, again, we look for the green download image.

This will take us to the download page where another large image gives us a direct link to the latest version from GibHub.

Clicking on the link will prompt the download of a ZIP file containing both the documentation and the ActionScript files we will need.
Once it is downloaded, you will need to unzip the files using either Windows’ built-in or other software like 7-Zip.
Now comes a step I don’t have an image for.
You will need to place the folder somewhere useful. Either on your Desktop or, as I do, in your (My) Documents folder. Regardless of where it is, make it somewhere easily accessible and memorable. We will need to find it again in few minutes.
Well, by this time, the Flash Develop installer should be about done.

If it is, go ahead and click “Finish” to, well, finish the installation. Flash Develop and its files should now be downloaded, configured, and installed. It’s finally time to start the program.
After starting Flash Develop, you will see that no files or projects are currently loaded. This is because Flash Develop will remember what you were working on last and reload it for you. However, nothing has been worked on yet, so we need to make a new project.
From the top-level menu, click on Project and then “New Project…”
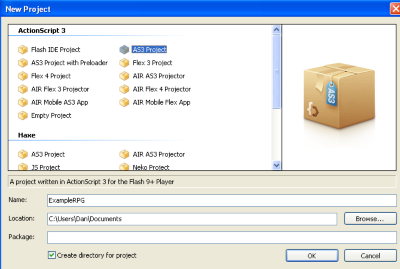
 This will take you to the New Project wizard and allow you to pick what type of project and options like its name.
Select the “AS3 Project” under the ActionScript 3 types.
For this example, I’m going to use “ExampleRPG” as the name.
Once you click “OK”, it will create this new project for you and load it under the Project view on the right-hand side.

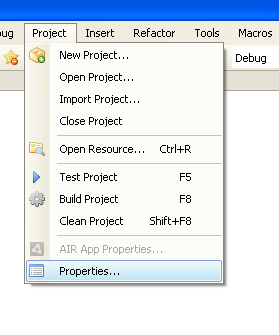
Now, to add the Flixel library to this project, we need to go back to the project’s properties.
From the top-level menu, click on Project and now this time “Properties…”
 From here, you can change what version of the Flash Player to compile for and the width and height of the eventual SWF files. However, time we are interested in the tabs.
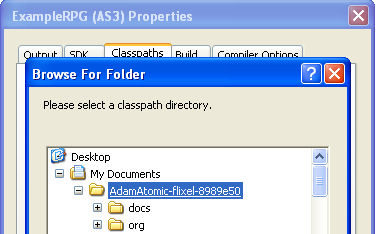
Clicking on Classpaths will allow us to add paths to the classes (libraries) we want to add to our project.
Clicking on “Add Classpath..” will open a dialog box and allow us to select the folder we want.
(If you, like me, placed the unzipped Flixel files in your (My) Document folder, that is where it should be now. If you did not, be sure to find its path.)
To add the Flixel library, we want the parent folder containing both the “org” and “docs” folders.
Clicking “OK” will now show the relative path to the Flixel files in the Classpaths tab.
Clicking “Apply” will add the library to the project.
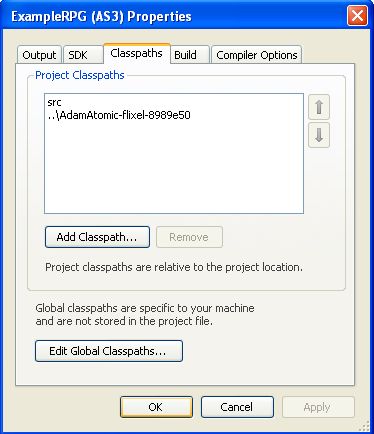
Clicking “OK” will close the Properties window and refresh the current project.
Within the Project view on the right-hand side should show both our files (if the view of src folder is expanded) and now the added Flixel library as well.

Finally, we are ready for Part 2 of this guide: Coding a simple example!
