Previously:
(Want to skip all the pictures and explanations? Here, download all the code covered in this post as a ZIP file. Or even look at the files on GitHub)
(Note: I won’t be defining every code practice. In order to save some time (both yours and mine), I am going to assume a general working knowledge of object-oriented programming. In order to make this post as useful as possible, I will be emphasizing Flixel’s own objects and properties.)
If you didn’t have any trouble following the process from Part 1, you should now be ready to actually write some code and move closer to having something running.
The first step is to add another class.
To do that, right-click on the “src” directory within the Project view on the right-hand side of the screen.
Select “New” and then “New Class…”

Name this new class “Preloader”

(The Preloader is part one of the core trinity of Flixel projects.
While they can, of course, have many more files, all Flixel projects have three primary classes: the loader (Preloader), the game (FlxGame), and at least one state (FlxState).
The loader does much as you might expect from its name. It loads the Flixel library and prepares everything for the next step, the game.)
After clicking “OK”, we will have a new class “Preloader” created for us with its public declaration and constructor left blank.
Before we can begin to fill in what will happen in the constructor, we will need to import the “org.flixel.system.FlxPreloader” code and then extend this class from FlxPreloader.
Finally, we set the “className” variable to our game name and have this class call its parent (super).
| package | |
| { | |
| /** | |
| * ... | |
| * @author Dan Cox | |
| */ | |
| import org.flixel.system.FlxPreloader; | |
| public class Preloader extends FlxPreloader | |
| { | |
| public function Preloader() | |
| { | |
| className = "ExampleRPG"; | |
| super(); | |
| } | |
| } | |
| } |
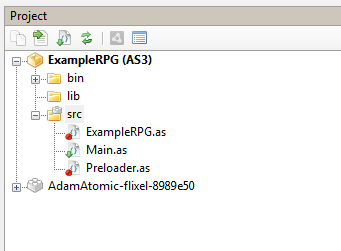
We should now have two files in the “src” directory: “Main.as” and “Preloader.as”

To add another class to this project (the next in line of the trinity), we again right-click on the “src” directory, select New and then “New Class…”
This time, we are going to name this class the same as the project name, “ExampleRPG”

Clicking “OK” will again produce a new class, “ExampleRPG”, with the class and constructor left empty. This will be our Game object
Unlike with the Proloader object, I am going to show the code first and explain what is happening afterward.
| package | |
| { | |
| /** | |
| * ... | |
| * @author Dan Cox | |
| */ | |
| import org.flixel.*; | |
| [SWF(width="640",height="480",backgroundColor="#000000")] | |
| [Frame(factoryClass="Preloader")] | |
| public class ExampleRPG extends FlxGame | |
| { | |
| public function ExampleRPG() | |
| { | |
| super(320, 240, PlayState, 2); | |
| forceDebugger = false; | |
| } | |
| } | |
| } |
So, as you can see, we are importing the full Flixel library.
And then we are defining how large to make the eventual SWF file.
(Note: Generally, 640 x 480 is a good, slightly large size for a Flash game on a page by itself. Depending on your needs, you can make this bigger or smaller though.)
On this next line, we are defining that the Frame be based on the factory class of our previously created Preloader class. (In other words, it will handle the loading for us.)
And then we are extending the ExampleRPG class to inherit from FlxGame.
Within the constructor itself we are stating how large to make the internal canvas, 320 x 240, what state to run first PlayState, and what the zoom level should be.
(Note: The canvas’ dimensions need to be multiples of the SWF’s size. For example, 320 * 2 = 640 and 240 * 2 = 480. The zoom level should be this multiplier. In this case, 2.)
Finally, we are turning off (setting to ‘false’) Flixel’s internal debugger for this particular example.
We should now have three files in our Project view under the “src” directory.
To complete the trinity of core Flixel objects, we now need our state (FlxState) for the previously created game (FlxGame) to run.
As was foreshadowed in the previous constructor, we will be calling this class “PlayState”
(Note: This is my own personal convention of naming files after their inheritance. “PlayState” is the state in which play happens. In a later part of this guide, I’ll show things like a “PlayerSprite” and “MenuState” that follow this same convention.)

Again, clicking “OK” will create a new file for us.
As the last part of the trinity, this will be the state (FlxState) in which things actually start to happen.
As a first step, we need to import the entire Flixel library “org.flixel.*” and then make sure to extend this class from FlxState.
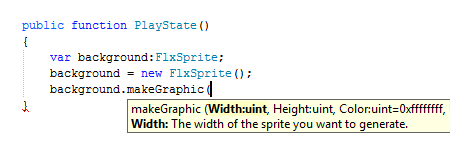
Then, within the constructor itself, we can define, create a new instance of, and tell a FlxSprite to make a graphic.
| package | |
| { | |
| /** | |
| * ... | |
| * @author Dan Cox | |
| */ | |
| import org.flixel.*; | |
| public class PlayState extends FlxState | |
| { | |
| public function PlayState() | |
| { | |
| var background:FlxSprite; | |
| background = new FlxSprite(); | |
| background.makeGraphic(100, 100); | |
| add(background); | |
| } | |
| } | |
| } |
If you typed the code in by hand (instead of copying and pasting it), you might have seen the code completion in action. If you ever are curious about what other properties or objects something has, you can investigate this by starting to type a property and then using the menu of options that pops-up after a second to scroll through what else it might have.
You can also use this to make sure the function call you are making matches its definition.
 (Note: As you might have noticed, Flash and ActionScript 3 use the hexadecimal notion for colors. They are also defined in a alpha-red-green-blue format. The color white, as used in this example code, fully visible would be 0xffffffff. Two ‘f’s for full visibility and then the RGB notion after that.)
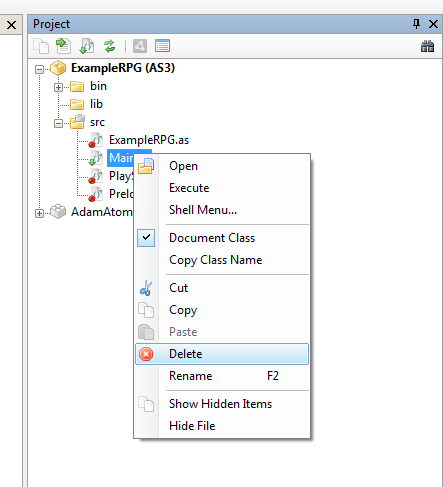
We should now have four files in our “src” directory. However, we only need the core three.
So, in order to delete “Main.as”, select it, right-click to bring up the context menu and select Delete.
Confirm that you do want to delete the file and it will finally be gone.
Now, we have the three files we need.
However, “Main.as” was the Document Class, so we will need to set a new one.
Select “ExampleRPG.as”, right-click to access the context menu and then select Set Document Class.

We are finally ready to compile and run the example.
Clicking on the Test Project button from the icon menu, selecting “Test Project” from the top-level Project menu, or simply pressing F5 will compile the code.
 Assuming everything went correctly and no mistakes were found, you should see the Flash Player running with our example code.
As per our instructions within the constructor of the PlayState object, there will be a 100 x 100 white square displayed starting from the top-left (0, 0) position.
 Hurray!
Our example code now works.
In Part 3, we will build on this base of three classes to add another state and work towards moving things on the screen from player input.
