Unity + Ink
- Part 1: Importing and Testing
- Part 2: Working with the Ink API
- Part 3: Building an Interface
- Part 4: Tags and Rich Text
- Part 5: Ink Variables and Functions
The narrative scripting language Ink works with the game engine Unity through a plugin that allows for quickly recompiling, testing, and integrating Ink files in a Unity project.
Importing and Testing
The first step to using Ink in Unity is to have Unity installed. Download the Unity Hub (or a specific version). Inside either the Unity Hub or via some other means, create a new project.

This example will be using a project called “Ink Testing”.
Getting the Ink Unity Plugin

In the new project, go to Window -> Asset Store to open a new tab to the Asset Store.
Note: Only signed-in users can use assets from the store. Before going forward, double-check there is a user signed-in to the Unity Store.
In the search bar, search for “Ink Unity” until the Ink logo is visible on an asset called “Ink Unity Integration” created by Inkle.

Click on this asset. Click on the “Download” button and then click on the now named “Import” button.

In the importing window, click on the “All” button and then the “Import” button.

Click on the game object “Main Camera” in the Hierarchy View.
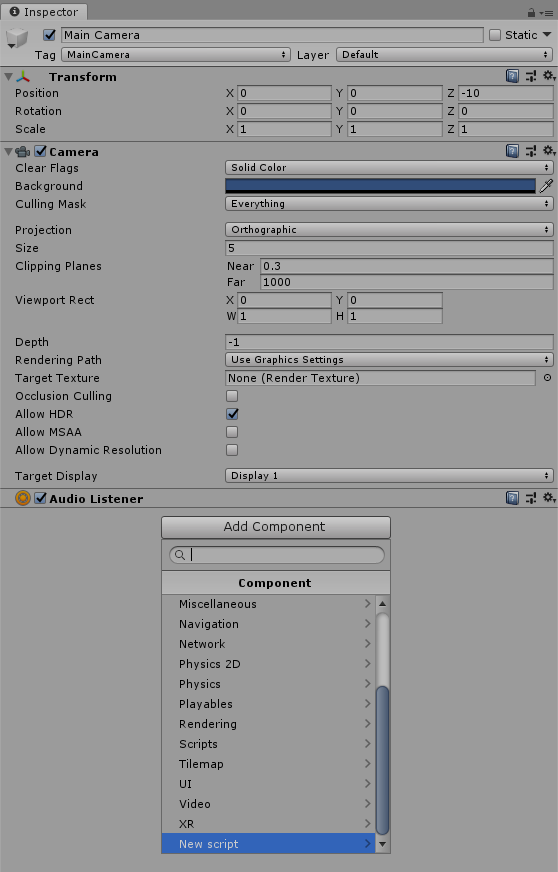
In the Inspector View, click on “Add Component” and then scroll down to “New Script”.

Click on “New Script”. Name this file “Ink Example” and then click on the “Create and Add” button.
Adding Ink Files
Select the “Assets” folder in the Project View. Through either right-clicking or the “Create” button, select “Folder”.
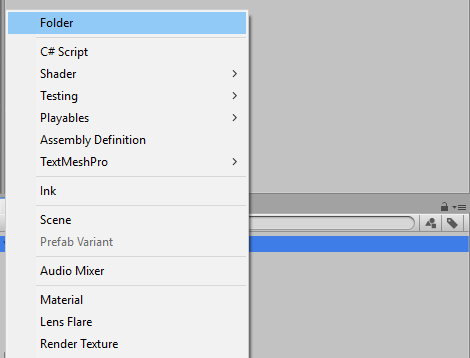
Name this new folder “Ink”
With the new folder named “Ink” selected, right-click or click on the “Create” button in the Project View.

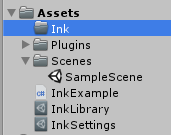
With the Ink Plugin added to the Project, Ink files can be created directly from Unity itself. Choose “Ink” from the menu.
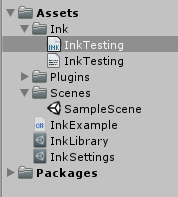
Name this new Ink file “InkTesting”. As soon as it is named, the Ink Unity plugin will compile it. Going forward, any time this file is updated while Unity is open, it will be re-compiled.
Writing Ink Code

Clicking on a Ink file from the Project View will show it in the Inspector View. Each file as an associated JSON Asset (the compiled file) and the ability to be played in Unity.
However, the Ink Unity Integration plugin DOES NOT come with an editor or the ability to edit Ink files directly in Unity itself. For writing Ink, the Inky Editor is recommended.
Clicking on the “Open” button from the Inspector View will prompt for the system-wide default editing program to associate the file with when opening. It is again highly recommended to use the Inky Editor when first learning Ink, but any text editor can work.
Once open, add the following example Ink code:
This is an example Ink file.

* Choice 1
    Nothing here!
    -> DONE
* Choice 2
    Nothing here either!
    -> DONE
Save the file. (Back in Unity, it will have been re-compiled.)
Testing
In Unity, double-click on the “InkExample” script file from the Project View.
Because this code will be using the Ink Runtime, the library will need to be included.
using System.Collections;
using System.Collections.Generic;
using UnityEngine;
using Ink.Runtime;
Two new variables will needed to be added within the object as well.
public TextAsset inkJSONAsset;
private Story story;
The first inkJSONAsset will serve as the input to this file and will be associated with the JSON Asset of the Ink file.
The second, story, will be the private Story object used across different internal functions.
Finally, within the Start() function, add the following:
story = new Story(inkJSONAsset.text);The JSON asset file’s text will be loaded as the input to a new Story object as its reference will be the internal variable story.
Save the file.
Associating Files

Clicking on the game object Main Camera in the Hierarchy View shows a new change in the Inspector View. In the Script Component area, there is a new field “Ink JSON Asset” with nothing associated with it.
With this file selected in the Project View, drag and drop the compiled JSON file from the Project View to this field.

Once accomplished, the compiled JSON file will be associated with that field and, in turn, the public variable inkJSONAsset within the script file.
Debugging Continue()
Through either double-clicking (if closed) or moving to the window with the file open, return to the “InkExample.cs” file.
Add a new line after the loading in the Start() function:
 // Start is called before the first frame update
    void Start()
    {
        story = new Story(inkJSONAsset.text);
        Debug.Log(story.Continue());
    }
Save the file.
In Unity, click on the “Play” button.
Checking the Console

The use of Debug.log() wrote to the Unity console.
If this window is not already open, go to Window -> General -> Console to open it. (Dragging the window to another can dock it there as a tab.)

The latest message of the Console window should be the following:
“This is an example Ink file.”
The use of the Continue() function loaded and returned the next text chunk of the story. Using the Debug.Log() function displayed it for testing purposes.
If this message was displayed, everything worked correctly and the Ink Unity Integration plugin is working!
