Unity + Ink
- Part 1: Importing and Testing
- Part 2: Working with the Ink API
- Part 3: Building an Interface
- Part 4: Tags and Rich Text
- Part 5: Ink Variables and Functions
The narrative scripting language Ink works with the game engine Unity through a plugin that allows for quickly recompiling, testing, and integrating Ink files in a Unity project.
Building an Interface
In the first part, the Ink Unity Integration plugin was added to a Unity project. In the second, the Ink API was used to load, parse, and work through a story’s text and choices.
The Ink example used throughout this series was the following:
This is an example Ink file.

* Choice 1
    Nothing here!
    -> DONE
* Choice 2
    Nothing here either!
    -> DONE
Building a UI
In the previous two parts, a Script was used as a component on the game object Main Camera. This was used as a way to demonstrate how the different Ink API worked together. However, this is not an efficient use of the types of game objects in Unity.

Click on the Main Camera game object. In the Inspector View, look for the Ink Example (Script) and click on the right-most icon, the gizmo. From the drop-down listing, click on “Remove Component”. This will disassociate the file from the Main Camera.
Creating a Canvas
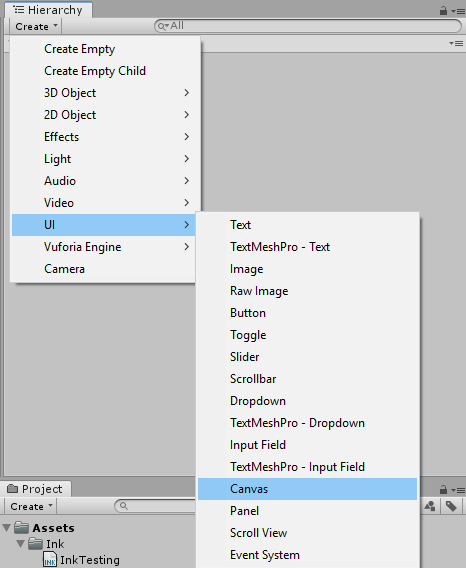
Working with UI in Unity works best with a Canvas, a game object used to hold other game objects and other UI elements.
In the Hierarchy View, click on Create or right-click and then UI -> Canvas.
Select the new Canvas game object. Click on Add Component from the Inspector View.

Select “Scripts” and then the Ink Example file. This will associate the file with the Canvas object.

Adding a Vertical Layout Group
With the Canvas game object selected, click on Add Component again.
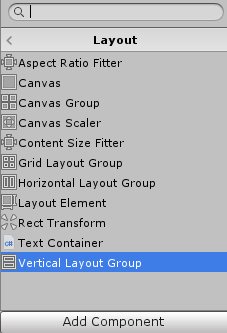
This time, choose Layout -> Vertical Layout Group. This will serve, as new elements are added, to create a row-like structure.
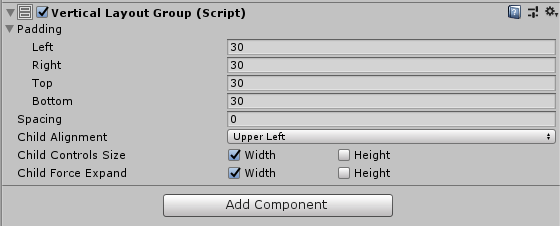
In the Inspector View, click on Padding in the new Vertical Layout Group component. Set Left, Right, Top, and Bottom to 30. Click on Width for both Child Controls Size and Child Force Expand.
The padding around the canvas will serve to leave a small border around all of the content from it and the edges of the canvas itself.
The second options will force the content to expand and allow the elements themselves to control its own width.
Planning UI
This new interface needs to replicate a fairly standard appearance of having text over some elements the user can interact with below it.
To have the text appear above choices, the UI element Text can be used. However, to make things easier, this will be added to a new game object that contains it.
 // Create a new GameObject
        GameObject newGameObject = new GameObject("TextChunk");
        // Set its transform to the Canvas (this)
        newGameObject.transform.SetParent(this.transform, false);
Once created, the new game object will need to be associated with the same transform space of its parent (the canvas). The function transform.SetParent() does this, matching the transform passed to it.
// Add a new Text component to the new GameObject
        Text newTextObject = newGameObject.AddComponent<Text>();
        // Set the fontSize larger
        newTextObject.fontSize = 24;
        // Set the text from new story block
        newTextObject.text = getNextStoryBlock();
        // Load Arial from the built-in resources
        newTextObject.font = Resources.GetBuiltinResource(typeof(Font), "Arial.ttf") as Font;
Next, a new Text object can be added through the AddComponent<Type>() function. A new Text component can be added to the new game object and the reference saved.
To help with visibility, its fontSize and font are set. The text property is set using the previously-defined getNextStoryBlock() function from the previous part.
For each choice, following a model from the previous part, the foreach() function can parse them all. However, instead of using Text, Button objects can be used instead.
 foreach (Choice choice in story.currentChoices)
        {
            Button choiceButton = Instantiate(buttonPrefab) as Button;
            choiceButton.transform.SetParent(this.transform, false);

            // Gets the text from the button prefab
            Text choiceText = choiceButton.GetComponentInChildren<Text>();
            choiceText.text = choice.text;

            // Set listener
            choiceButton.onClick.AddListener(delegate {
                OnClickChoiceButton(choice);
            });

        }
For the listener, an onClick event is used. The delegate keyword is used to pass a method as a parameter to the AddListenerer() function. Whenever a button is clicked, the function onClickChoiceButton() function is used.
// When we click the choice button, tell the story to choose that choice!
    void OnClickChoiceButton(Choice choice)
    {
        story.ChooseChoiceIndex(choice.index);
        refresh();
    }
Separating out the ChooseChoiceIndex() function to its own now, the OnClickChoiceButton() function now takes a choice and tells the story a certain choice has been made.
This also calls refresh(), the new function that will serve as the central hub for all of the UI elements. However, once final things is needed: clearUI().
Each time the refresh() function is called, it should update all of the UI elements. It cannot know ahead of time how much text or how many choices might be per story chunk. Therefore, all of the game objects should be cleared and then re-created per click action.
// Clear out all of the UI, calling Destory() in reverse
    void clearUI()
    {
        int childCount = this.transform.childCount;
        for (int i = childCount - 1; i >= 0; --i)
        {
            GameObject.Destroy(this.transform.GetChild(i).gameObject);
        }
    }
Working with a Prefab
In the existing code, the Instantiate() function is used to clone an existing object from in the Unity project. What is cloned is a Prefab Button.
To create this Prefab, create a Button.

In the Project View, create a folder. Name it “Prefabs”.
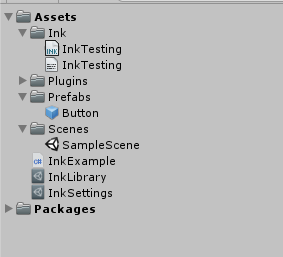
Drag and drop the game object from the Hierarchy View to the Project View and in the “Prefabs” folder.

Right-click on the new Button and choose Delete. (Make sure it is in the Prefabs folder before deleting!)
In the InkExample.cs file, add the following about the existing functions:
public Button buttonPrefab;Select the Canvas object from the Hierarchy View.

Drag and drop the compiled InkTesting file (if not already associated). Drag and drop the prefab Button to the Button Prefab field, connecting that object as well.
InkExample.cs Code
Final Result

With the new code using a Canvas element and creating its own Text and Button objects, the code will create new UI elements representing text and choices each time there is a click on one of the buttons.

Thanks so much for these tutorials! You already make the best Twine tutorials on the internet, and then lo-and-behold you come out with this series just as I’m starting a Twine + Unity project.
I’ve run into a problem I was hoping you could help me with. I’m trying to modify your formula to create a UI like the one in the Inky editor, in which all of the previously displayed text remains visible, but my Unity skills are still pretty rudimentary and I can’t seem to figure it out.
Any suggestions? Thanks in advance!
This is a much more complicated question than can be explained in a couple paragraphs, but I’ll try here.
If you want just the text itself, you can add to the existing text content of an Text object by simply concatenating (adding) to it. However, you may quickly see that the text exceeds its size. For that issue, you will need a ScrollBar or, more correctly, a ScrollRect. (See this video, https://www.youtube.com/watch?v=ArH0S2Cdptk, for a crash course in how to arrange things.)
What you will probably need to end up doing is have the options (Buttons) in a different Panel than the Text game object. Upon clicking a button, any new story chunks will be added to the end of the Text.text and the previous buttons will be cleared before new ones are drawn.
Something to consider, as I mentioned in passing here, is to use a Canvas with different Panels. Like Canvas game objects, they can also use different layouts. You could have the vertical layout I used for buttons as part of the Panel that held the Buttons, for example, and use a different layout for the Panel holding the Text.
I don’t know how helpful this is, but my advice would be to break the Canvas into Panels and then work with them separately.
Awesome. Thank you so much. I’m still getting my head around how the Unity hierarchy works, and this is very helpful.