Part 1: Configuring, Programming, and Compiling
Part 2: Placing Tiles and Moving Sprites
Part 4: Colliding Sprites and Project Management
Configuring, Programming, and Compiling
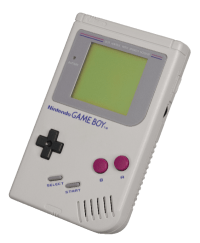
While the Game Boy have been discontinued since 2003, the system itself, its underlining chip and instruction set, remain a viable way to explore video game programming for smaller, more constrained hardware. Luckily, instead of writing in assembly code for the device as many programmers did at the time, we can now write in a modified version of the C programming language to create games using a library called GBDK, the Game Boy Developers Kit!
Note: For this series, and starting with this first part, I’m going to assume a Windows environment. GBDK can, in fact, be compiled on different platforms, but many of the additional tools for easier map and tile creation run on Windows.
Configuring

To get started, download the GBDK from SourceForge. (The latest Windows version can be found here.)
Once downloaded, unzip the files to your hard drive, preferably in a location like “C:\gbdk”.
Note: Because later build scripts will use “C:\gbdk\bin” as part of their instructions, it is highly recommended to placed the files on the C drive or another easily accessible location.
Programming

As mentioned before, GBDK uses the C programming language. For those coming from something like C#, Java, or other high-level languages, it will look very familiar. However, it also comes with a few new general “rules” to follow for the most efficient code for the platform.
- Objects, as they might exist in other languages, aren’t in C. And you can’t use structs to mirror this functionality, either. Most of your code will be based on functions and arrays.
- Whenever possible, use globals, too. Instead of defining a variable within a function, define it once and then, if possible after, re-use that same name as a way to cut down on calls to the stack.
- Instead of using “int”, use “UINT8” at all times.
- Other than in a few specific cases, most values will be in hexadecimal.
Game Boy Hardware
Summed up in four words, the hardware for the Game Boy can be stated as this: you have 256 tiles. That’s it. You can’t add more to the system, and each tile is 8 pixels by 8 pixels. This means, in practice, that you must make choices about what graphics will be included, where they will be shown, and how often you can repeat something in advance. Decisions about content, unlike for a more modern platform, means that, as a developer, you must be conscious of how much space is being devoted to things like a menu when you might also want to include an extra level. The constraints of the hardware make balancing space concerns an important part of the design of any Game Boy game.
Graphic tables
The Game Boy provides two main memory sections of graphics in its hardware: sprites and background. As part of background, it also has a ‘window’ that can be used in different ways. However, unless you want to layer things, the window and background shared space can be thought of as simply the ‘background’ by itself. A tile (8×8 pixels) is either one or the other as well. It can either be loaded as part of the sprites or it can be part of the background. And, in total, sprites cannot exceed 128 (0 – 127) without running into the background table space.
Once loaded, and in general, tiles are referenced by their location within the table and can moved (sprites) or placed (background). Tiles are also defined by a series of hexadecimal values representing which color to show.
For example, for a blank, 8×8 tile, the string of values would be the following:
0x00,0x00,0x00,0x00,0x00,0x00,0x00,0x00,
0x00,0x00,0x00,0x00,0x00,0x00,0x00,0x00,
0x00,0x00,0x00,0x00,0x00,0x00,0x00,0x00,
0x00,0x00,0x00,0x00,0x00,0x00,0x00,0x00
Switches
Like other platforms of its type, the Game Boy must be told, specifically, when to do things like turn on, show sprites, or increase the volume. For the most part, these can be thought of as ‘switches’: you turn them on or off depending on your needs.
Compiling
Before we can compile a program, we need a minimum of two files: the build script and C source.
Build Script
This file contains hidden or bidirectional Unicode text that may be interpreted or compiled differently than what appears below. To review, open the file in an editor that reveals hidden Unicode characters.
Learn more about bidirectional Unicode characters
| C:\gbdk\bin\lcc -Wa-l -Wl-m -Wl-j -DUSE_SFR_FOR_REG -c -o main.o main.c | |
| C:\gbdk\bin\lcc -Wa-l -Wl-m -Wl-j -DUSE_SFR_FOR_REG -o main.gb main.o | |
| pause |
C Source
This file contains hidden or bidirectional Unicode text that may be interpreted or compiled differently than what appears below. To review, open the file in an editor that reveals hidden Unicode characters.
Learn more about bidirectional Unicode characters
| #include <gb/gb.h> | |
| void init(); | |
| void checkInput(); | |
| void main() { | |
| init(); | |
| while(1) { | |
| checkInput(); | |
| // Game code here | |
| } | |
| } | |
| void init() { | |
| DISPLAY_ON; // Turn on the display | |
| NR52_REG = 0x8F; // Turn on the sound | |
| NR51_REG = 0x11; // Enable the sound channels | |
| NR50_REG = 0x77; // Increase the volume to its max | |
| } | |
| void checkInput() { | |
| if (joypad() & J_B) { | |
| // The B button was pressed! | |
| } | |
| } |
Save both of the above files. If GBDK has been installed correctly (or its path changed in the build script), the file should compile and produce a “main.gb” file to be run on your Game Boy emulator of choice. Congratulations! You have successfully compiled a Game Boy game and are ready to move on to Part 2: Placing Tiles and Moving Sprites!

