[Previously, I covered how to draw many of the things I’m going to combine together in this post. Things like bricks, doors, floors, ground, and plant tiles.]
When I first started making games a couple of years ago, I didn’t know about many of the tools I use now. Instead of relying on integrated development environments and game libraries, I was trying to do everything through basic text editors and creating maps using Excel. As you might imagine, anything but the simplest of mechanics quickly grows out of the scope. It is just too complicated and time-consuming to make games that way.
That’s why there are tools like Tiled to help with specific tasks. In this case, making maps quickly from spritesheets.

(Definition: A spritesheet is a portmanteau of “sprite” and “sheet”. It’s a set of images — sprites — collected under a theme or for the purpose of quickly loading resources. Usually, individual images are referenced either by index, where they are positioned relative to the other images around them, or by the specific position within a coordinate system of the larger spritesheet itself like its x and y from the upper- or bottom-left corners.
Tiled uses the nomenclature of tiles, sprites created for the purpose of being drawn with others to create a larger image by arranging them in patterns. A tileset, then, is just a spritesheet of tiles for the use of making a map or other composite image object.)
Within Tiled, there are two main categories: tilesets and layers. For a single map, there can be multiple of either, so they are further subdivided into each named tileset and different layers describing what exists within them. Depending on usage, there can be Tile Layers, Object Layers, or even Image Layers.
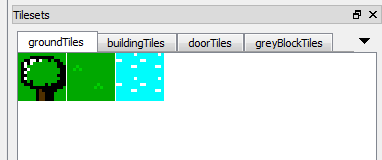
For this example, I’m going to use the following four tilesets:


To start, install Tiled for your operating system. It works on Windows, Mac OS X, and even most popular Linux distributions. (Once ready, make sure you have download the example tilesets too.)
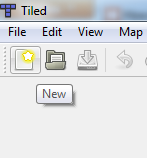
To make a new map, it’s as simple as clicking on the first icon on the menu or going to File->New.
Once you do that, you will be presented with options of what type of map orientation, layer format, and what map or default tile size to use.
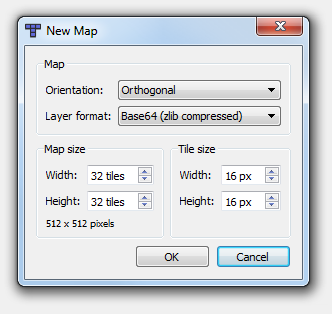
For this example, we will be using “Orthogonal” Orientation and the Layer Format of “Base64 (zlib compressed)”.
(The orientation of orthogonal means that the viewing angle of the user to the map is either a right angle or close to it. In other words, we are “looking down” at a flat map from straight above it.)
(Layer format is how the data of the map itself will be saved. Since maps can be very big and potentially have hundreds if not thousands of individual tiles, this data can be compressed and then encoded to save space when output to a file.)
And since each tile within our tilesets are 16 x 16, we do not need to change the tile size options.
However, a 32 x 32 map size is rather large to start with, so we will reduce that down to a smaller 16 x 16 size.
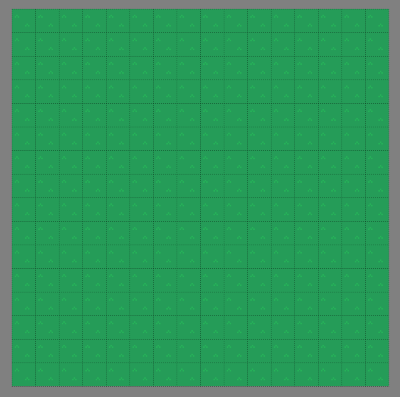
 Clicking “OK” will then produce an empty 16 x 16 map.
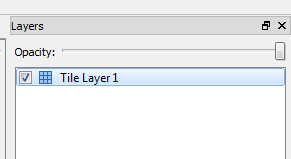
It will also create for us a new Tile Layer called, naturally, “Tile Layer 1”.
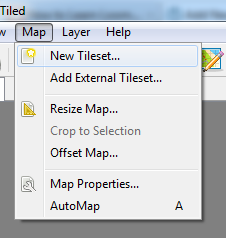
To add a new tileset to this layer, we need to go to Map->New Tileset…
From here, we can name this new tileset, pick the spritesheet (Image) we want to use, and change different drawing options such as its margins and offsets.
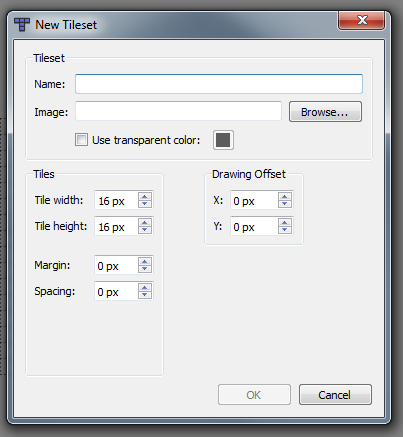
For now, we will only click on “Browse” and select the “groundTiles.png” file downloaded eariler.
This will create a name based on the file’s name and list the path to the file in the Image field.
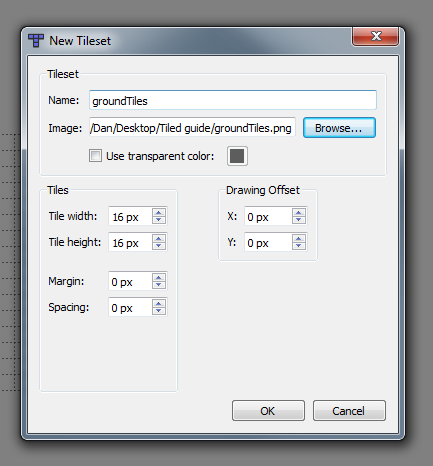 Clicking “OK” will add this tileset to our collection.
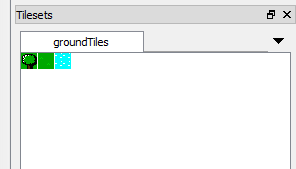
Before we start to draw with these tiles, however, I recommend zooming in on both this individual tileset and the overall map using the drop-down menu in the lower right-hand corner. (For my screen resolution, moving from 100% to 300% works best.)
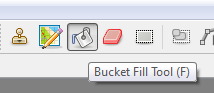
Tiled gives us several different ways to draw tiles. We can Stamp Brush, Terrain Brush, Bucket Fill, or Eraser.
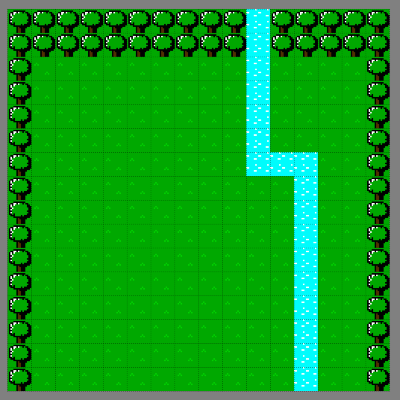
To begin to draw this map, we will use the Bucket Fill Tool.
Selecting the middle (grass) tile from the first tileset and the bringing the cursor over the map will show a preview of what will be drawn. To commit the change, we need only click once.
With the map now filled with the grass tile, we can begin to draw the edges of our map.
To do that, we can select the Stamp Brush and then the tree tile.
For each click on the map, we can draw a single tree.

And, to add some water tiles, we need only click on that tile and on the map where we want them.
Then, to add another tileset to our collection, we go back to Map->New Tileset… and select another file, allowing the default values to be set.
In fact, we can load the rest of the tilesets now too.
(In order to see all tileset names, you may need to change the size of the layer frame within Tiled. To do that, find the edge between the map and layer frame. The cursor will change from its default to the resize icon. Clicking-and-dragging allows you to change the widths of the frames.)
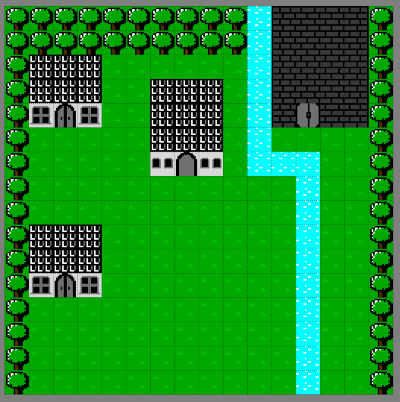
Now that all the tilesets are loaded, drawing the rest of the map is a matter of selecting each individual tile from each set and, using the Stamp Brush, drawing them in place.
The roof tiles (part of the buildingTiles set) go above the window and door tiles. The left and right sides of the greyBlockTiles go on their respective sides.
If any mistakes happen, or you don’t like the placement of a particular tile, you can use the Eraser tool to, well, erase that tile.
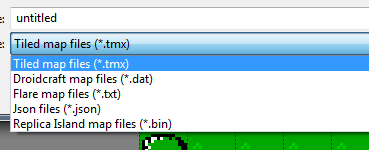
Once we have a map the way we want, it is time to output the file.
By default, Tiled uses its own TMX file format created as a derivative of XML. With its own set of tags attributes, it can be read using any XML parsing library or function. However, whatever options were set during the initial creation of the map (the Layer Format) will be what the internal data of the map data is either compressed in, encoded, or both. In order to retrieve such data, it might need to be decoded or uncompressed using a separate library such as AS3-Tiled-Reader for those projects written in ActionScript 3.
To bypass this issue, or even use a preferred file format, use the File->Save As.. option and pick a format from the file dialog’s drop down menu.
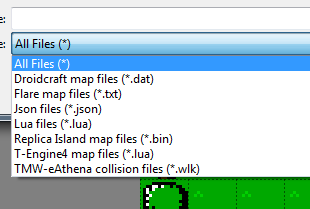
You can even File->Export As… the map information in a few more formats or create your own file extension if needed.
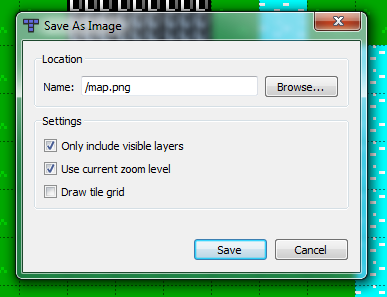
Or even, if you prefer to merely see the map as a single image at the current zoom level and with or without the grid lines, you can File->Save As Image… as I did at the beginning of this post.