Previously:
- Making a game with Flash Develop + Flixel: Part 1, Installing and Configuring
- Making a game with Flash Develop + Flixel: Part 2, Coding a simple example
- Making a game with Flash Develop + Flixel: Part 3, Input and Objects
- Making a game with Flash Develop + Flixel: Part 4, Tilemaps and Collisions
(Want to bypass the long explanations and see the final product? Here, download this post’s code as a ZIP file.)
Coming away from Part 4, we had a FlxTilemap as part of our PlayState object. After adding to the state, we were checking if it collided during our override of the update function.
However, just like with the PlayerSprite, we can also move this into its own object: MapTilemap. That way, all of the functionality for the Map is part of one object and file. It can become a separate module.
| package | |
| { | |
| /** | |
| * ... | |
| * @author Dan Cox | |
| */ | |
| import org.flixel.*; | |
| public class MapTilemap extends FlxTilemap | |
| { | |
| [Embed(source = "data/tilemap.png")] private var tilemapPng:Class; | |
| private var mapData:Array = | |
| [1,1,1,1,1,1,1,1,1,1,1,1,1,1,1,1,1,1,1,1, | |
| 1,0,0,0,0,0,0,0,0,0,0,0,0,0,0,0,0,0,0,1, | |
| 1,0,0,0,0,0,0,0,0,0,0,0,0,0,0,0,0,0,0,1, | |
| 1,0,0,0,0,0,0,0,0,0,0,0,0,0,0,0,0,0,0,1, | |
| 1,0,0,0,0,0,0,0,0,0,0,0,0,0,0,0,0,0,0,1, | |
| 1,0,0,0,0,0,0,0,0,0,0,0,0,0,0,0,0,0,0,1, | |
| 1,0,0,0,0,0,0,0,0,0,0,0,0,0,0,0,0,0,0,1, | |
| 1,0,0,0,0,0,0,0,0,0,0,0,0,0,0,0,0,0,0,1, | |
| 1,0,0,0,0,0,0,0,0,0,0,0,0,0,0,0,0,0,0,1, | |
| 1,0,0,0,0,0,0,0,0,0,0,0,0,0,0,0,0,0,0,1, | |
| 1,0,0,0,0,0,0,0,0,0,0,0,0,0,0,0,0,0,0,1, | |
| 1,0,0,0,0,0,0,0,0,0,0,0,0,0,0,0,0,0,0,1, | |
| 1,0,0,0,0,0,0,0,0,0,0,0,0,0,0,0,0,0,0,1, | |
| 1,0,0,0,0,0,0,0,0,0,0,0,0,0,0,0,0,0,0,1, | |
| 1,1,1,1,1,1,1,1,1,1,1,1,1,1,1,1,1,1,1,1]; | |
| public function MapTilemap() | |
| { | |
| loadMap(FlxTilemap.arrayToCSV(mapData, 20), tilemapPng); | |
| } | |
| } | |
| } |
And thus, adjusting our PlayerState, it now looks like this:
| package | |
| { | |
| /** | |
| * ... | |
| * @author Dan Cox | |
| */ | |
| import org.flixel.*; | |
| public class PlayState extends FlxState | |
| { | |
| private var player:PlayerSprite; | |
| private var map:MapTilemap; | |
| public function PlayState() | |
| { | |
| map = new MapTilemap(); | |
| add(map); | |
| player = new PlayerSprite(50,50); | |
| add(player); | |
| } | |
| override public function update():void | |
| { | |
| super.update(); | |
| FlxG.collide(player, map); | |
| } | |
| } | |
| } |
Notice too that, even though we have moved the few lines of code and created a new object, the mechanics of the game haven’t change.
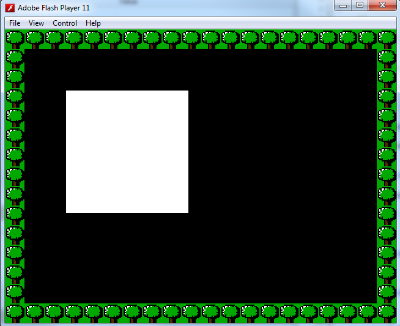
However, even with that separation, we are still using an array in MapTilemap. If we wanted to change the layout, we would have to pull up that file, edit the array directly, and then recompile the whole project.
What if we didn’t have to do that?
Let’s make the comma separated values be a file by itself and then embed it within the MapTilemap object.
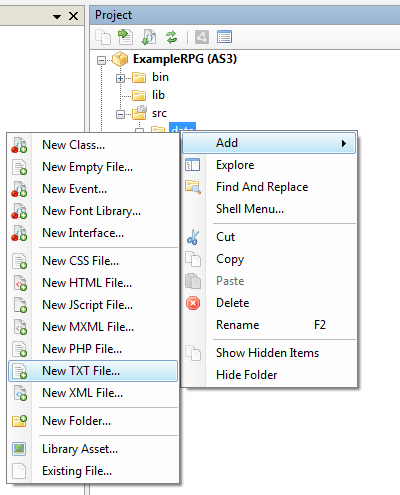
Selecting “data”, go to New and then “New TXT File…”
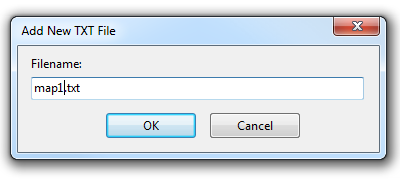
Name it “map1.txt”
 Copy the values of the array and then paste them into the new file. Make sure the brackets are not in the file with the CSV values.
The new file should look like this.
 1,1,1,1,1,1,1,1,1,1,1,1,1,1,1,1,1,1,1,1,
 1,0,0,0,0,0,0,0,0,0,0,0,0,0,0,0,0,0,0,1,
 1,0,0,0,0,0,0,0,0,0,0,0,0,0,0,0,0,0,0,1,
 1,0,0,0,0,0,0,0,0,0,0,0,0,0,0,0,0,0,0,1,
 1,0,0,0,0,0,0,0,0,0,0,0,0,0,0,0,0,0,0,1,
 1,0,0,0,0,0,0,0,0,0,0,0,0,0,0,0,0,0,0,1,
 1,0,0,0,0,0,0,0,0,0,0,0,0,0,0,0,0,0,0,1,
 1,0,0,0,0,0,0,0,0,0,0,0,0,0,0,0,0,0,0,1,
 1,0,0,0,0,0,0,0,0,0,0,0,0,0,0,0,0,0,0,1,
 1,0,0,0,0,0,0,0,0,0,0,0,0,0,0,0,0,0,0,1,
 1,0,0,0,0,0,0,0,0,0,0,0,0,0,0,0,0,0,0,1,
 1,0,0,0,0,0,0,0,0,0,0,0,0,0,0,0,0,0,0,1,
 1,0,0,0,0,0,0,0,0,0,0,0,0,0,0,0,0,0,0,1,
 1,0,0,0,0,0,0,0,0,0,0,0,0,0,0,0,0,0,0,1,
 1,1,1,1,1,1,1,1,1,1,1,1,1,1,1,1,1,1,1,1
Now that we have this data in the file, let’s embed it. (Using the right-click menu of “Generate Embed Code.”)
(Note: Because TXT file can have any type of data, we also need to include a mime type with the embed code. For this, we can use “application/octet-stream”.)
(Note: I’ve made one additional change to the file. Because our zero index was a tile as well, I extended out the argument list for the loadMap call to include the fact that zero index should be drawn as well.)
| package | |
| { | |
| /** | |
| * ... | |
| * @author Dan Cox | |
| */ | |
| import org.flixel.*; | |
| public class MapTilemap extends FlxTilemap | |
| { | |
| [Embed(source = "data/tilemap.png")] private var tilemapPng:Class; | |
| [Embed(source = "data/map1.txt", mimeType = "application/octet-stream")] private var mapTxt:Class; | |
| public function MapTilemap() | |
| { | |
| loadMap(new mapTxt, tilemapPng, 16, 16, 0, 0, 0); | |
| } | |
| } | |
| } |
With that taken care of, we can move back to the PlayerSprite object and finally switch from using the makeGraphic to a loadGraphic with animations.
First, we need to download the new file. So, either click the following and put it in the data folder or, if you downloaded the full project at the beginning of the post, you already have it.

Once we have the file within our project, we generate the embed code and then load it with the loadGraphic function.
To add animations, we specify the name (String) of the subset, its frames, the framerate, and if it should loop or not. This is needed for sever separate animation loop too. So, for ours, it needs to four addAnimaiton calls: “Down”, “Right”, “Left” and “Up”.
To actually play these animations, it is only a matter of calling play() with the individually named subsets.
| package | |
| { | |
| /** | |
| * ... | |
| * @author Dan Cox | |
| */ | |
| import org.flixel.*; | |
| public class PlayerSprite extends FlxSprite | |
| { | |
| [Embed(source = "data/walk.png")] private var WalkPng:Class; | |
| public function PlayerSprite(X:Number = 0, Y:Number = 0) | |
| { | |
| super(X, Y); | |
| loadGraphic(WalkPng, true, false); | |
| addAnimation("Down", [0, 1, 2], 10, false); | |
| addAnimation("Right", [3, 4, 5], 10, false); | |
| addAnimation("Left", [6, 7, 8], 10, false); | |
| addAnimation("Up", [9, 10, 11], 10, false); | |
| } | |
| override public function update():void | |
| { | |
| super.update(); | |
| if (FlxG.keys.W || FlxG.keys.UP) | |
| { | |
| y -= 3; | |
| play("Up"); | |
| } | |
| else if (FlxG.keys.S || FlxG.keys.DOWN) | |
| { | |
| y += 3; | |
| play("Down"); | |
| } | |
| else if (FlxG.keys.A || FlxG.keys.LEFT) | |
| { | |
| x -= 3; | |
| play("Left"); | |
| } | |
| else if (FlxG.keys.D || FlxG.keys.RIGHT) | |
| { | |
| x += 3; | |
| play("Right"); | |
| } | |
| } | |
| } | |
| } |
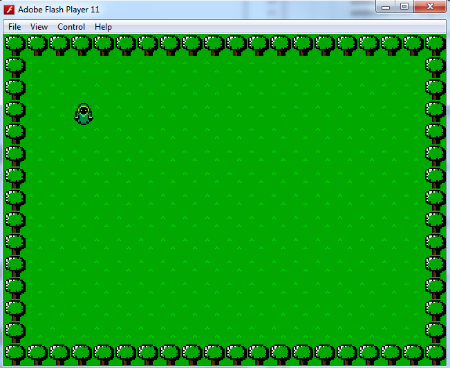
Re-compiling the project will now show our new green-hooded character on a background of grass with trees around the edges.
However, if you move the character using WASD or the arrow keys, you notice the movements are slightly unnatural. The direct manipulation of the x and y position doesn’t look as organic as it could be.
The solution to this, and to the problem of moving by a fixed number hard-coded per direction, is to add a new variable “speed” that contains the amount we want to move.
Then, since we are using speed, we can use Flixel’s built-in physics system to track velocity as well.
At the start of the update loop, we will set velocity of x and y to zero. Then, for each direction, we now add or subtract our speed instead of “3”.
| package | |
| { | |
| /** | |
| * ... | |
| * @author Dan Cox | |
| */ | |
| import org.flixel.*; | |
| public class PlayerSprite extends FlxSprite | |
| { | |
| [Embed(source = "data/walk.png")] private var WalkPng:Class; | |
| private var speed:int = 130; | |
| public function PlayerSprite(X:Number = 0, Y:Number = 0) | |
| { | |
| super(X, Y); | |
| loadGraphic(WalkPng, true, false); | |
| addAnimation("Down", [0, 1, 2], 10, false); | |
| addAnimation("Right", [3, 4, 5], 10, false); | |
| addAnimation("Left", [6, 7, 8], 10, false); | |
| addAnimation("Up", [9, 10, 11], 10, false); | |
| } | |
| override public function update():void | |
| { | |
| super.update(); | |
| velocity.x = 0; | |
| velocity.y = 0; | |
| if (FlxG.keys.W || FlxG.keys.UP) | |
| { | |
| velocity.y -= speed; | |
| play("Up"); | |
| } | |
| else if (FlxG.keys.S || FlxG.keys.DOWN) | |
| { | |
| velocity.y += speed; | |
| play("Down"); | |
| } | |
| else if (FlxG.keys.A || FlxG.keys.LEFT) | |
| { | |
| velocity.x -= speed; | |
| play("Left"); | |
| } | |
| else if (FlxG.keys.D || FlxG.keys.RIGHT) | |
| { | |
| velocity.x += speed; | |
| play("Right"); | |
| } | |
| } | |
| } | |
| } |
And thus we come to the end of this post, having moved our CSV data to a new file and added in the first set of animations.
For Part 6, we expand our map by introducing the camera system and responding to the event of collision + player input to show text on the screen.
