![]()
Working with Ren’Py:
- Part 1: Downloading and Configuring
- Part 2: Editing and Creating Characters
- Part 3: Scenes and Showing Images
- Part 4: Menus, Labels, and Jumps
- Part 5: Variables and Conditional Statements
- Part 6: Transitions
- Part 7: Building Distributions
Advanced Ren’Py:
- Part 1: Screen Language
- Part 2: Position Style Properties
- Part 3: Animation and Transformation Language
- Part 4: Text and Button
- Part 5: Bar and VBar
- Part 6: Textbutton and Imagebutton
- Part 7: Input, Key, and Mousearea
Customizing Ren’Py:
- Part 1: Editing options.rpy
- Part 2: Editing gui.rpy
- Part 3: Style Inspector and Overriding Styles
- Part 4: Special Screen Names and Overriding Screens
- Part 5: Replacing Default GUI Images
Ren’Py + Python:
- Part 1: Setting and Using Flags
- Part 2: Python Blocks
- Part 3: User-Defined Displayables
- Part 4: User-Defined Statements
- Part 5: Custom Text Tags
Ren’Py is a engine for creating visual novels. It comes with a suite of tools for taking code and transforming it into programs that can be run on Windows, Mac, Linux, and even, with a little more work, mobile platforms like Android and iOS.
Building for Windows, Mac, and Linux
Once a project has been finished or is at a point where play-testing can begin, Ren’Py can help build the project for release on Windows, Mac, and Linux systems.

After selecting the project from the left-hand side of the Ren’Py Launcher, click on “Build Distributions” from under Actions on the top of the right-hand set of options.

The Ren’Py Launcher will provide the opportunity to change any of the default settings or take additional actions.
If unsure or no additional actions are needed at this time, click “Build” to continue.

Depending on the size of the project and the operating systems chosen, this process can take some time.

Once finished, the Ren’Py Launcher will open a folder containing the files.
Note: The above screenshot was taken on a Windows system. Other operating systems or versions may appear differently.
The files can now be sent out for play with a wider audience or to others for play-testing.
Building for Android
While building distributions for Windows, Mac, and Linux systems is self-contained and easy, building for Android devices is a multi-step process can can, potentially, take significant time to work through and wait for updates, downloads, and code compiling.

Click on “Android” under Actions to begin.

To continue, the Ren’Py Launcher must download the Ren’Py Android Packaging Tool. Agree to continue with the process.

The Ren’Py Launcher will download an update.
 The Ren’Py Launcher will need to be restarted.
Once the Ren’Py Launcher restarts, click on “Android” again under Actions to open a new building process.
Install SDK & Create Keys

Click on “Install SDK & Create Keys” to begin.

The Ren’Py Launcher will download and extrtact the SDK.

To proceed, the Android SDK Terms and Conditions must be accepted.

The Ren’Py Launcher will ask if signing keys exist or not. If unsure or if signing keys have not previously been created, click “Yes”.

The Ren’Py Launcher will ask for confirmation that the created keys are stored in a secure place. Verify and then click “Yes” to continue.

The Ren’Py Launcher will ask for the name of the organization

If everything has been configured, click “Continue” to proceed to the next step.
Configure

Click on “Configure” to proceed.

Fill out the application name and click “Continue” to proceed.

Fill out the short name of the application.

Enter the name of the package.
Note: It is highly recommended to enter something like “com.author name.project name” without spaces between words and all lowercase if unsure.

Enter a number for the version.
Note: If the default text provided by the Ren’Py Launcher is entered, an error will occur and the configuring process will need to be restarted.
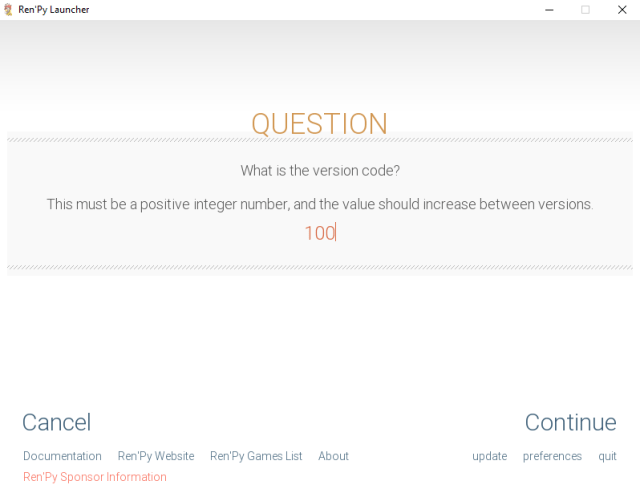
Enter a version code or accept the default number.

Choose the orientation. (If unsure, choose the default, landscape, orientation.)

Choose the in-app purchasing option. (If unsure, choose the default, neither, option.)
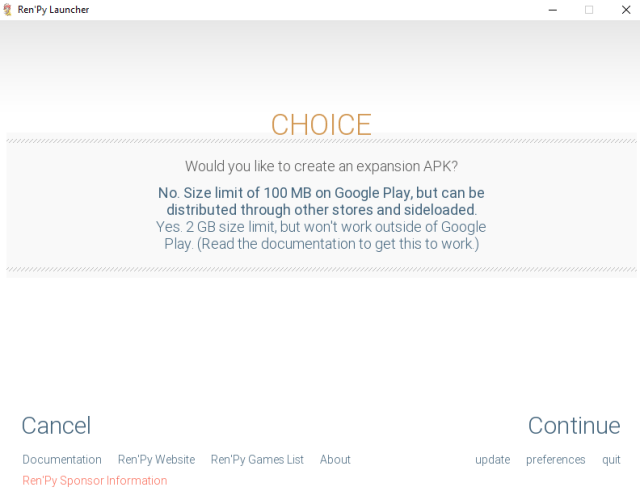
Choose an expansion APK option. (If unsure, choose “No…”.)
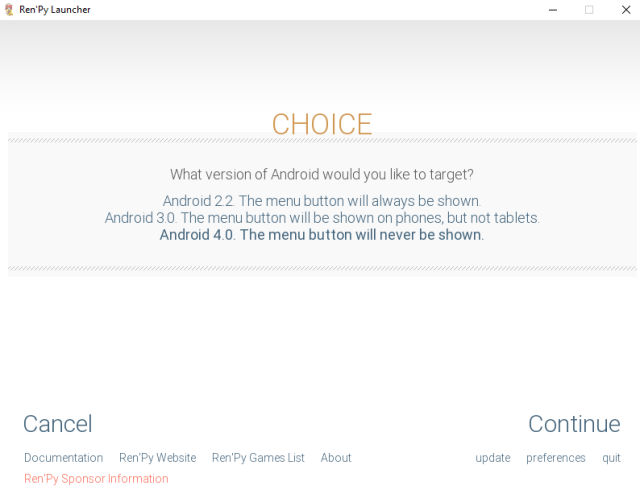
Choose the Android version. (If unsure, choose the default, Android 4.0, option.)
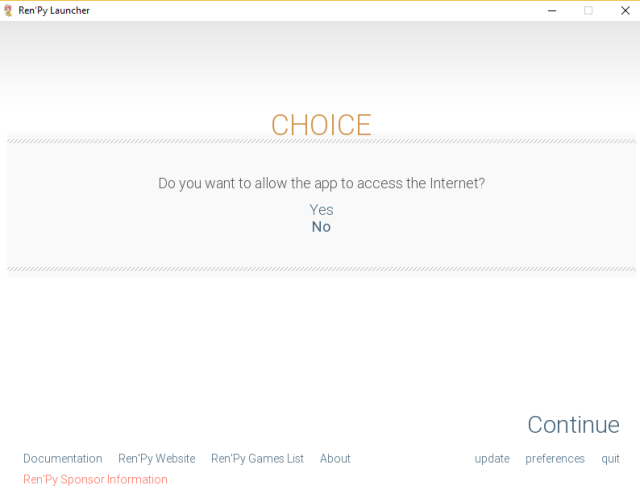
Choose if the project should access the Internet or not. (If unsure, choose the default, No, option.)
Build Package

Once a project has been configured, it can be built, installed, or launched.
Build
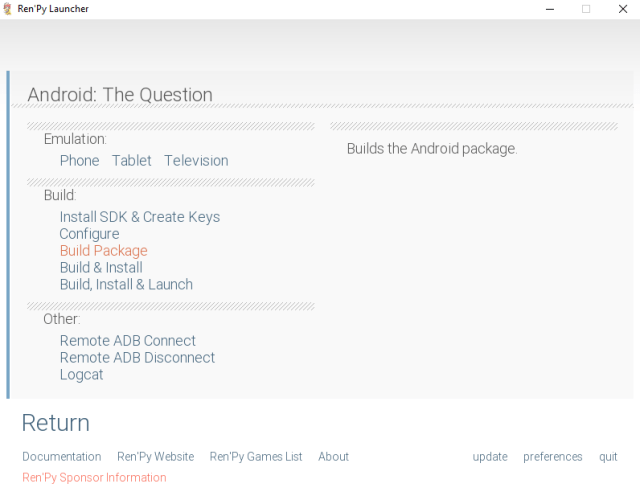
To test if the project will build correct without install or launching it, click “Build Package”
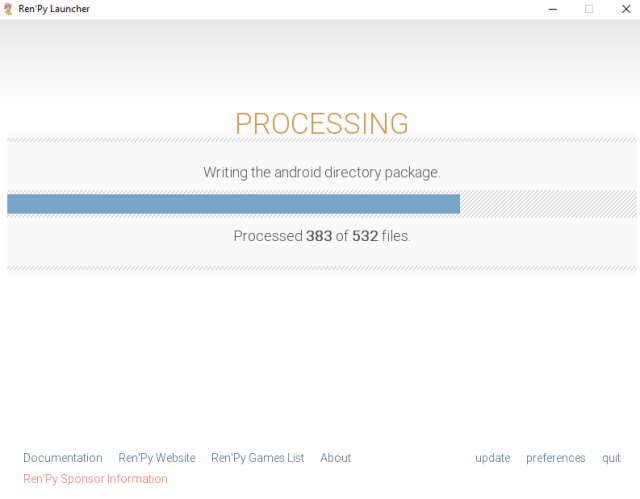
The Ren’Py Launcher will build the project.
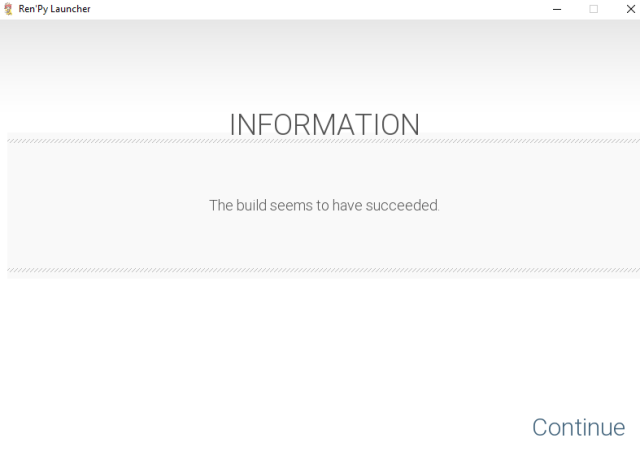
If successful, the Ren’Py Launcher will finish the process and open a folder.
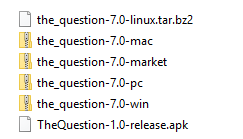
The built APK file will be found in the opened folder.
Note: If following this post from start to finish, the folder will also contain the previously built distributions for Windows, Mac, and Linux systems.
Build & Install, and Build, Install & Launch

Both Build & Install and Build, Install & Launch require physical (or virtual) devices to be connected to the computer. If they are not, an error will occur “failed to get featured set: no devices/emulators found” and the process will stop. Click “Cancel” to return to the menu.
Note: Using the Remote ADB Connection (to connect without a physical cord), may require enabling Remote ADB Access through the Developer Mode on the device. Refer to Google’s Instructions on how to enable Developer Mode.
Emulation

The Ren’Py Launcher can attempt to emulate the project on a Phone, Tablet, or Television. Clicking on these will launch the emulation in a new window with the input matching the description to the right of each option as described in the Ren’Py Launcher.
